WPF ListView comes under 10 most important controls in WPF. ListView represents a control in WPF which display a collection of data items. ListView is capable of showing data items in different views. It comes with its default view GridView which show items in tabular format. WPF ListView contains almost same features as ListBox as it is inherit from ListBox control.
In this post, I am showing some examples of below tasks:
- Add items in XAML
- Add ListView items in C#
- ItemsPanel and ItemsPanelTemplate – Change Layout of items
- ListView Binding
Add WPF ListView Items in XAML
For adding the ListView items in XAML, we have to create objects of ListViewItem. The most important property in ListViewItem is Content property. Content property is used for setting the text of the ListViewItems.
<ListView x:Name="ItemsListView" Height="300" Width="400">
<ListViewItem Content="Item 1" />
<ListViewItem Content="Item 2" IsSelected="True" />
<ListViewItem Content="Item 3" />
<ListViewItem Content="Item 4" />
<ListViewItem Content="Item 5" />
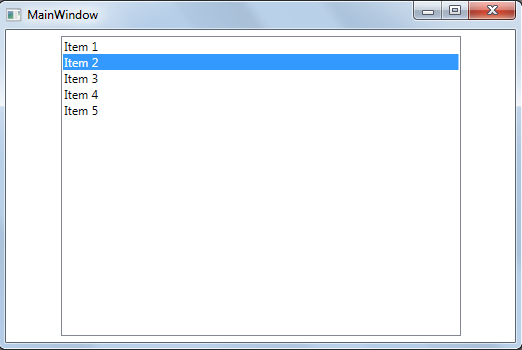
</ListView>In the above XAML code, I have created 5 listview items. For showing the default selection of the particular ListViewItem, we have to set the IsSelected property to true.

Add ListView Items in C#
To add ListViewItems in C#, we have to create objects of ListViewItems and set the Content property for Item text.
public partial class MainWindow : Window
{
        public MainWindow()
        {
            InitializeComponent();

            for (int i = 1; i < 5; ++i)
            {
                ItemsListView.Items.Add(new ListViewItem { Content = "Item " + i.ToString() });
            }
            (ItemsListView.Items[1] as ListViewItem).IsSelected = true;
        }
 }
In the above code, I have added 5 ListView items and for selection of second item I have set the IsSelected property of the second item to True. Please Note Add methods of items property takes an Object as parameter. So, for selecting the second Item, we have to cast that item to ListViewItem.
ItemsPanel and ItemsPanelTemplate – Change Layout of items
By default, WPF ListView used VirtualizingStackPanel for defining the layout of items. ItemsPanel and ItemsPanelTemplate properties is used for changing the layout of items. ItemsPanel property is used for defining the Template for the Panel and ItemsPanelTemplate is used for defining the Panel which creates the layout of data items.
<ListView x:Name="ItemsListView" Height="100" Width="200" ScrollViewer.HorizontalScrollBarVisibility="Disabled">
<ListView.ItemsPanel>
<ItemsPanelTemplate>
<WrapPanel />
</ItemsPanelTemplate>
</ListView.ItemsPanel>
<ListViewItem Content="Item 1" />
<ListViewItem Content="Item 2" IsSelected="True" />
<ListViewItem Content="Item 3" />
<ListViewItem Content="Item 4" />
<ListViewItem Content="Item 5" />
<ListViewItem Content="Item 6" />
<ListViewItem Content="Item 7" />
<ListViewItem Content="Item 8" />
<ListViewItem Content="Item 9" />
<ListViewItem Content="Item 10" />
<ListViewItem Content="Item 11" />
<ListViewItem Content="Item 12" />
<ListViewItem Content="Item 13" />
<ListViewItem Content="Item 14" />
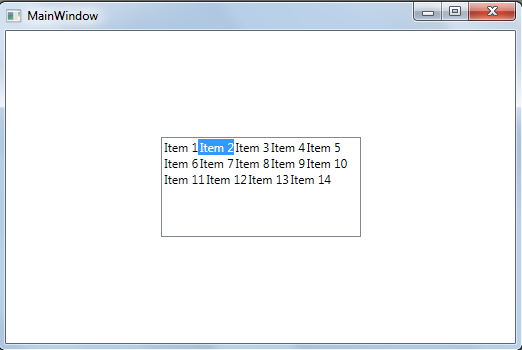
</ListView>In the above XAML code, I have used the WrapPanel for changing the Layout of items. I have disable the HoroziontalScrollBarVisibility so that items will not flow above the ListView width and flow to the next line. Below is the screenshot of ListView with WrapPanel as its ItemsPanel Template.
ListView Binding
We don’t have to bind ListViewItem every time we have to show data items in ListView. We can bind any collection of object to it. For binding collection of items, we have to use the ItemsSource property. ItemsSource property takes any collection that implements IEnumerable interface.
In the below example, I will show you how to bind collection of Employee objects to WPF ListView.
public class Employee
{
        public int ID { get; set; }
        public string Name { get; set; }
        public int Age { get; set; }

        public override string ToString()
        {
            return this.Name.ToString();
        }

        public static List<Employee> GetDefaultEmployees()
        {
            List<Employee> employees = new List<Employee>();
            for (int i = 0; i < 10; ++i)
            {
                employees.Add(new Employee { Name = "Name " + i.ToString(), Age = (i + 20) });
            }
            return employees;
        }
}
This Employee class contains three properties ID, Name, and Age. I have overridden the ToString() property because by default ListView call the Object ToString() method for showing the data for the item. GetDefaultEmployees method return the List of sample Employees which we will use to bind the ListView.
Now, we have to create a XAML file for showing the list of Employees.
<Window x:Class="WpfApplication4.MainWindow"
        xmlns="http://schemas.microsoft.com/winfx/2006/xaml/presentation"
        xmlns:x="http://schemas.microsoft.com/winfx/2006/xaml"
        Title="MainWindow" Height="350" Width="525">
    <Grid>
        <ListView x:Name="ItemsListView" Margin="10">
        </ListView>
    </Grid>
</Window>
public partial class MainWindow : Window
{
public MainWindow()
{
InitializeComponent();
ItemsListView.ItemsSource = Employee.GetDefaultEmployees();
}
}In the above code, I have created a simple ListView in XAML and bind that ListView ItemsSource property with the list of employees returned by the GetDefaultEmployees() method.
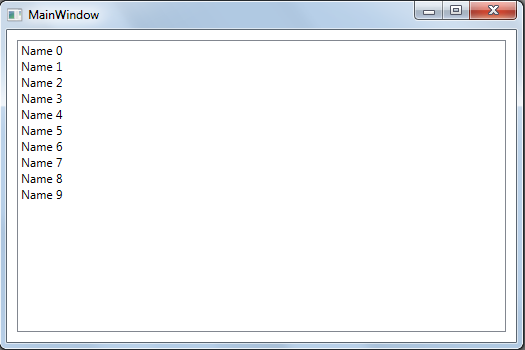
In the above screenshot, we are only able to show Name property which comes from by calling the ToString(). But if we want to show more properties in ListView, we have to use ItemTemplate property of ListView.